Primary Injection vs Secondary Injection Testing for ANSI 50/51 Overcurrent Relays (Substations)
If you work around substations long enough (generation, transmission, or distribution), you’ll notice something: most protection issues aren’t “mysteries”. They’re usually a chain problem—settings, wiring, CT polarity, logic, trip circuit, breaker mechanics, or documentation that didn’t reflect what was actually in service.
In my day-to-day at EuroSMC, we manufacture primary injection, secondary injection, and measurement equipment precisely for that reality: testing protection isn’t just pushing current—it’s proving the protection system does what you think it does, when it matters.
This article is a practical guide to secondary injection and primary injection testing, using the typical maintenance/commissioning workflow for ANSI 50/51 overcurrent relays.
What secondary injection and primary injection really prove
A quick way to think about it:
-
Secondary injection proves the relay (logic, settings, curves, and I/O behavior) by injecting signals into the relay’s measurement inputs (current/voltage) and validating pickup, timing, outputs, and logic.

-
Primary injection proves the whole chain by injecting current in the primary circuit so you’re validating more of the real path: CT behavior (to a degree), wiring, relay response, trip circuit, and the breaker operation under a more end-to-end scenario.

Here’s the part people miss: they’re not interchangeable. They answer different questions.
“What does each test validate?” (fast map)
| You want to verify… | Secondary injection | Primary injection |
|---|---|---|
| ANSI 50 pickup (instantaneous) and output behavior | ✅ Great | ✅ Yes |
| ANSI 51 time curve points & tolerances | ✅ Great | ✅ Yes (slower, heavier) |
| Relay logic, blocking, interlocks, scheme I/O | ✅ Best choice | ⚠️ Possible but not efficient |
| Wiring from relay to breaker trip coil (functional trip) | ✅ With trip test | ✅ Often included |
| CT ratio/polarity under real current path | ⚠️ Limited | ✅ Much better |
| Breaker / trip mechanism performance | ⚠️ Only with functional trip | ✅ Core strength |
Safety note (non-negotiable)
If you’re testing in or around CT circuits: never leave a CT secondary open under load. Use proper shorting links/test blocks and follow your site procedure. A “simple” mistake here can become a serious hazard.
My practical rule
-
If you’re validating settings + relay performance, start with secondary injection.
-
If you’re validating the installation, or troubleshooting “it trips in the lab but not in the yard”, you’ll likely need primary injection (or at least a solid functional trip plus wiring checks).
That’s why in many maintenance workflows, secondary injection comes first: it’s faster, safer, and isolates relay-side problems before you bring high current into the picture.
Secondary injection testing workflow for ANSI 50/51 (step-by-step)
When I’m setting up a secondary injection test plan for an ANSI 50/51 relay, I want three outcomes:
-
Confirm pickup values are correct (and stable).
-
Confirm timing matches the curve/settings (ANSI 51).
-
Confirm outputs and logic behave as designed (trip/alarm/targets/SCADA points).
1) Pre-checks that save hours later
Before injecting anything:
-
Record relay model/firmware, active setting group, CT ratios, curve type, time dial, instantaneous settings.
-
Check the relay clock/time sync and event record capacity.
-
Verify input/output mapping: which output is trip, which is alarm, which is seal-in, etc.
-
If possible: do a quick “dry” logic check (inputs toggled, expected outputs observed).
This is also where I like to decide what “evidence” I need: screenshots, exported reports, or a formal PDF with timestamps. In practice, the report is what survives audits and handovers—not your memory.
2) ANSI 50 (instantaneous) checks
For ANSI 50, you’re validating:
-
Pickup threshold (does it assert where it should?)
-
Operation time (often very fast; check expected relay behavior and output)
-
Reset behavior (does it drop out properly?)
Inject current near the threshold first (just below, then just above). It’s a simple pattern, but it exposes big mistakes: wrong CT ratio in settings, wrong units, wrong group active, etc.
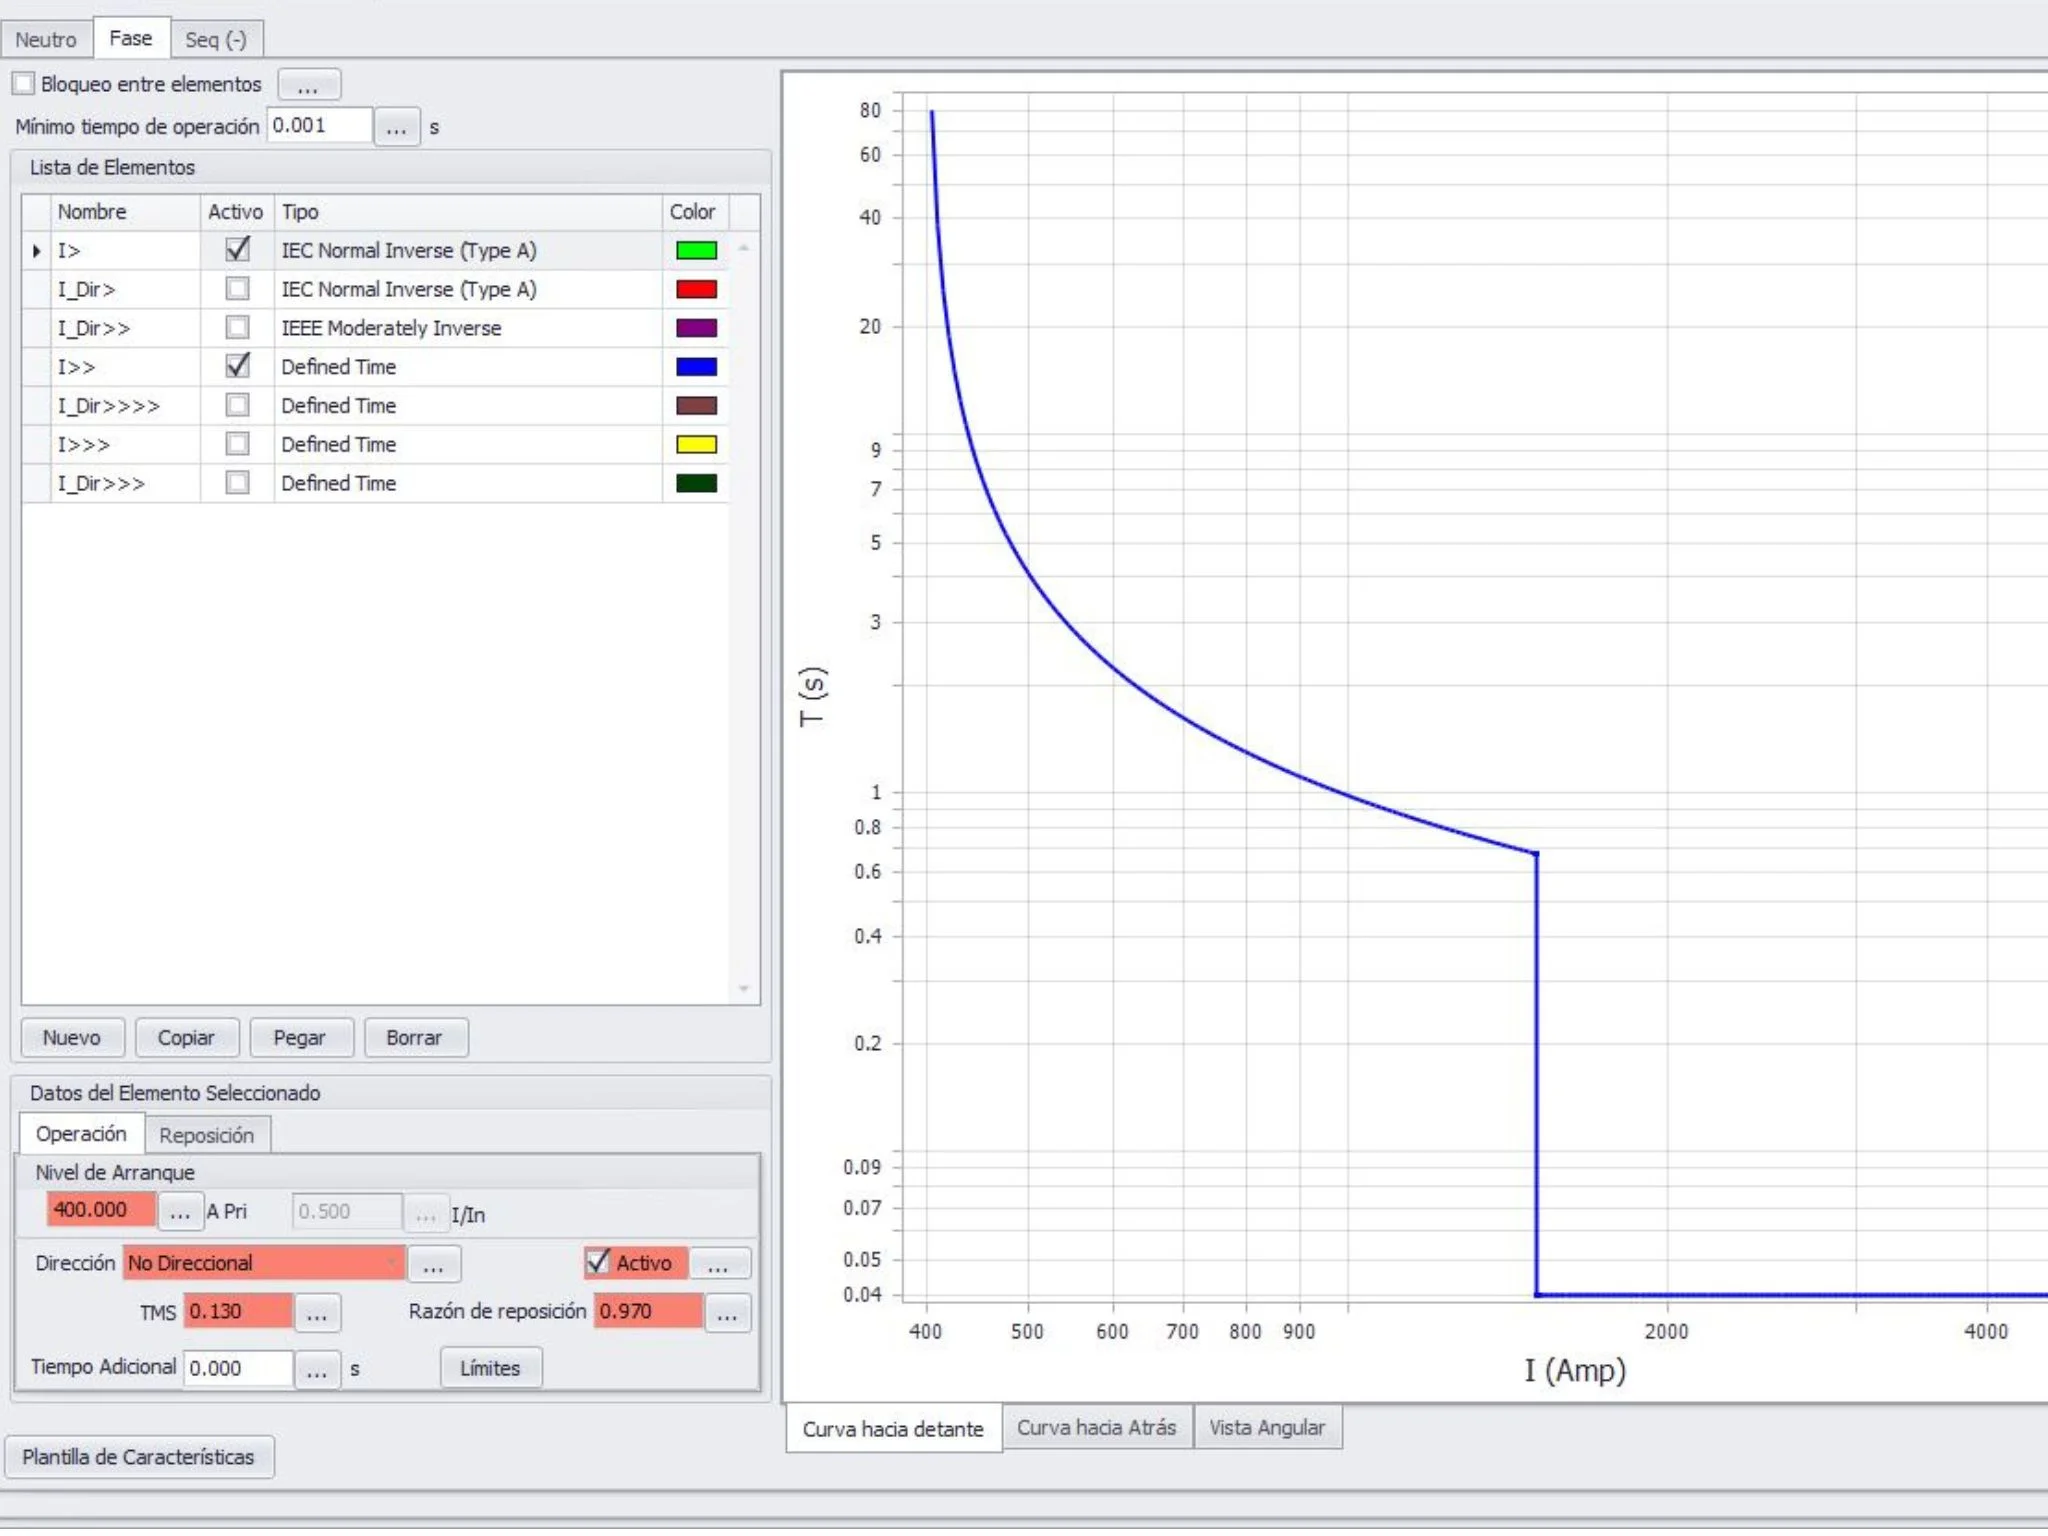
3) ANSI 51 (time overcurrent) checks: choose your points smartly
For ANSI 51, don’t waste time testing ten points if three will prove the curve is correct. I like:
-
One point near the lower multiple (e.g., ~1.5–2× pickup)
-
One mid-range point (e.g., ~4–6× pickup)
-
One higher point (still within safe relay input limits)
You’re looking for:
-
Expected operating time vs measured time
-
Consistency across repeated runs
-
Any unexpected delays from logic (blocking signals, inputs asserted, etc.)
4) Outputs, scheme logic, and “does it actually trip?”
Secondary injection is where you should validate logic paths:
-
Blocking inputs (e.g., switchgear interlocks)
-
Seal-in, targets, alarms
-
Inter-trip or permissive schemes (if applicable)
Then do a controlled functional trip test (site rules permitting): prove the relay can drive the trip circuit and the breaker mechanism responds, without needing primary current.
5) Where tools and software actually matter
This is where a modern 3-phase secondary injection set helps—not because it’s “fancy”, but because it reduces human error and improves repeatability. In EuroSMC we build systems like Quasar for three-phase secondary injection, and we pair it with ROOTS relay testing software when teams need:

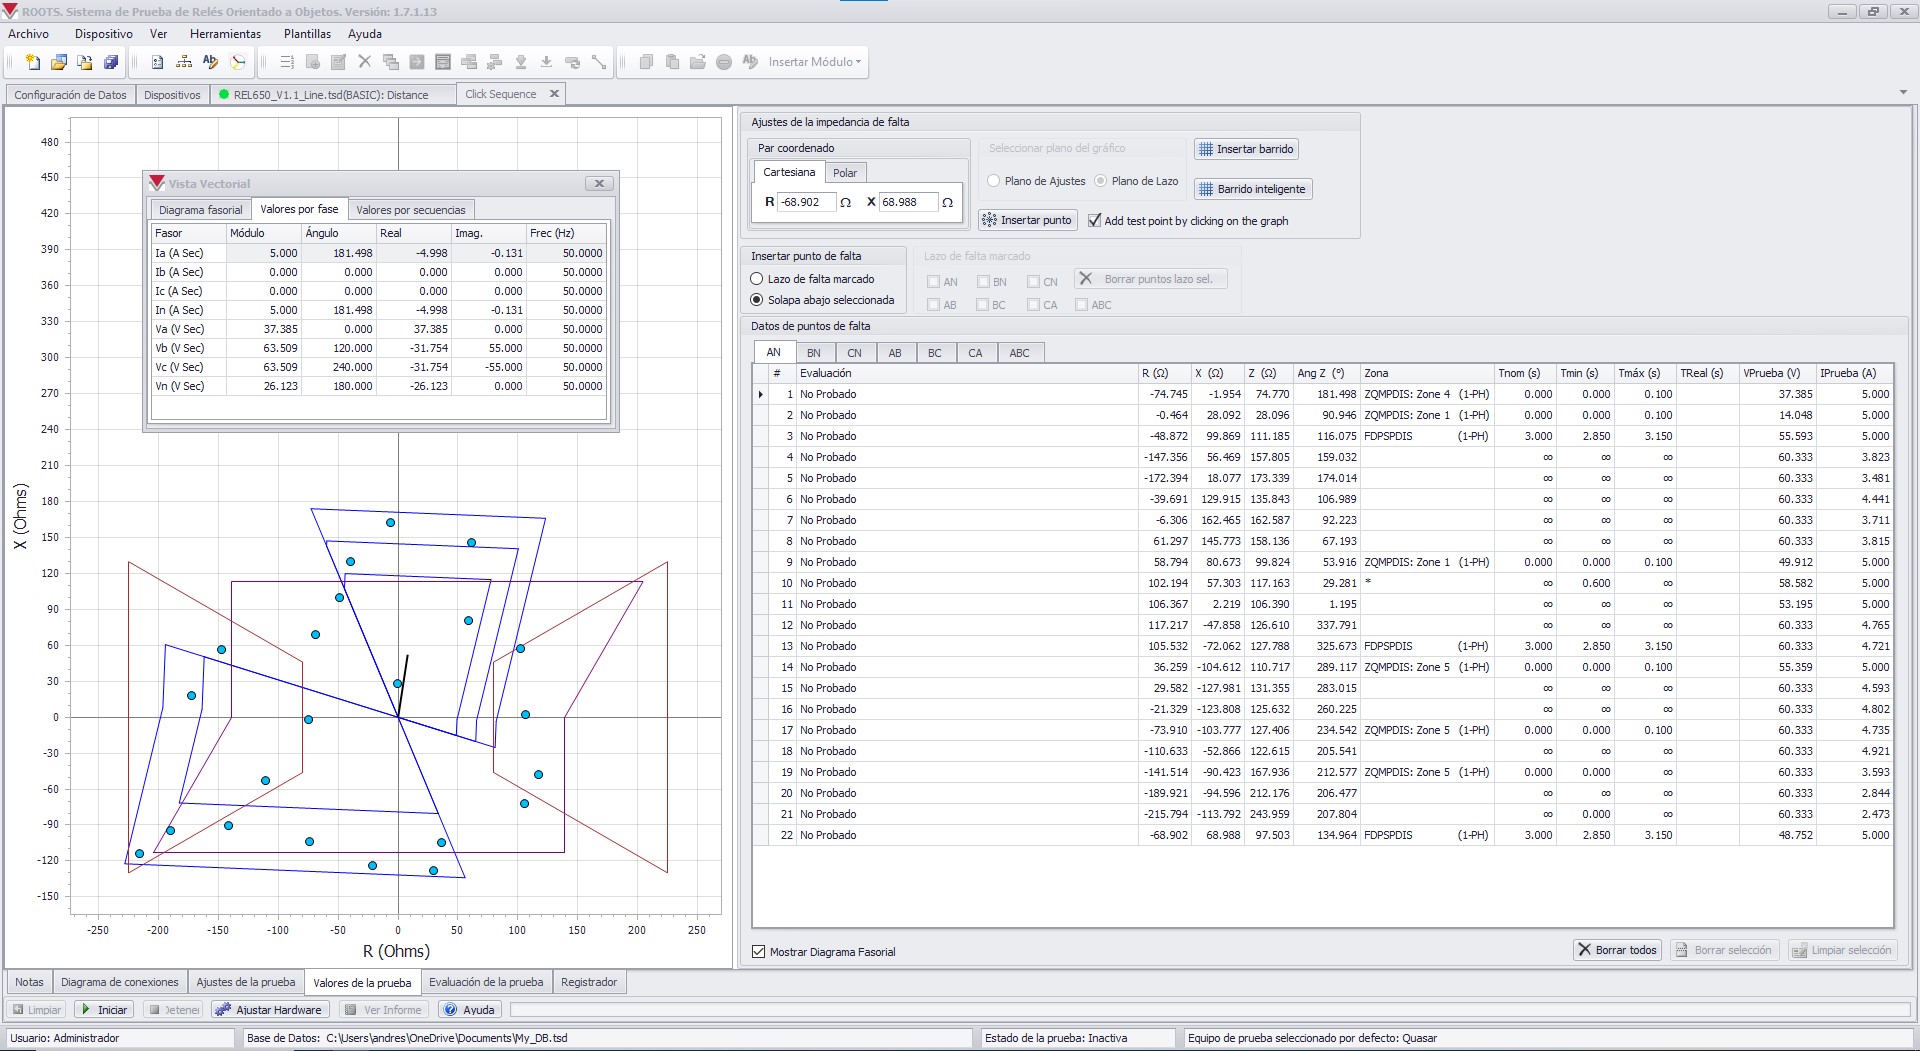
-
Reusable test templates
-
Automatic curve-point execution
-
Consistent reports across technicians and sites
The biggest gain isn’t speed. It’s that you stop “hand-testing” the same logic every outage and you get a defensible report every time.
Primary injection testing workflow (and when it’s worth it)
Primary injection is the heavy lift: more setup, more coordination, more safety controls. But when you need it, nothing else replaces it.
I reach for primary injection when:
-
Commissioning a new installation and I want more end-to-end confidence
-
Troubleshooting a mismatch between relay results and field behavior
-
Verifying the current path (including CT primary conditions) under controlled injection
-
Validating the breaker/trip chain with realistic current stimulus
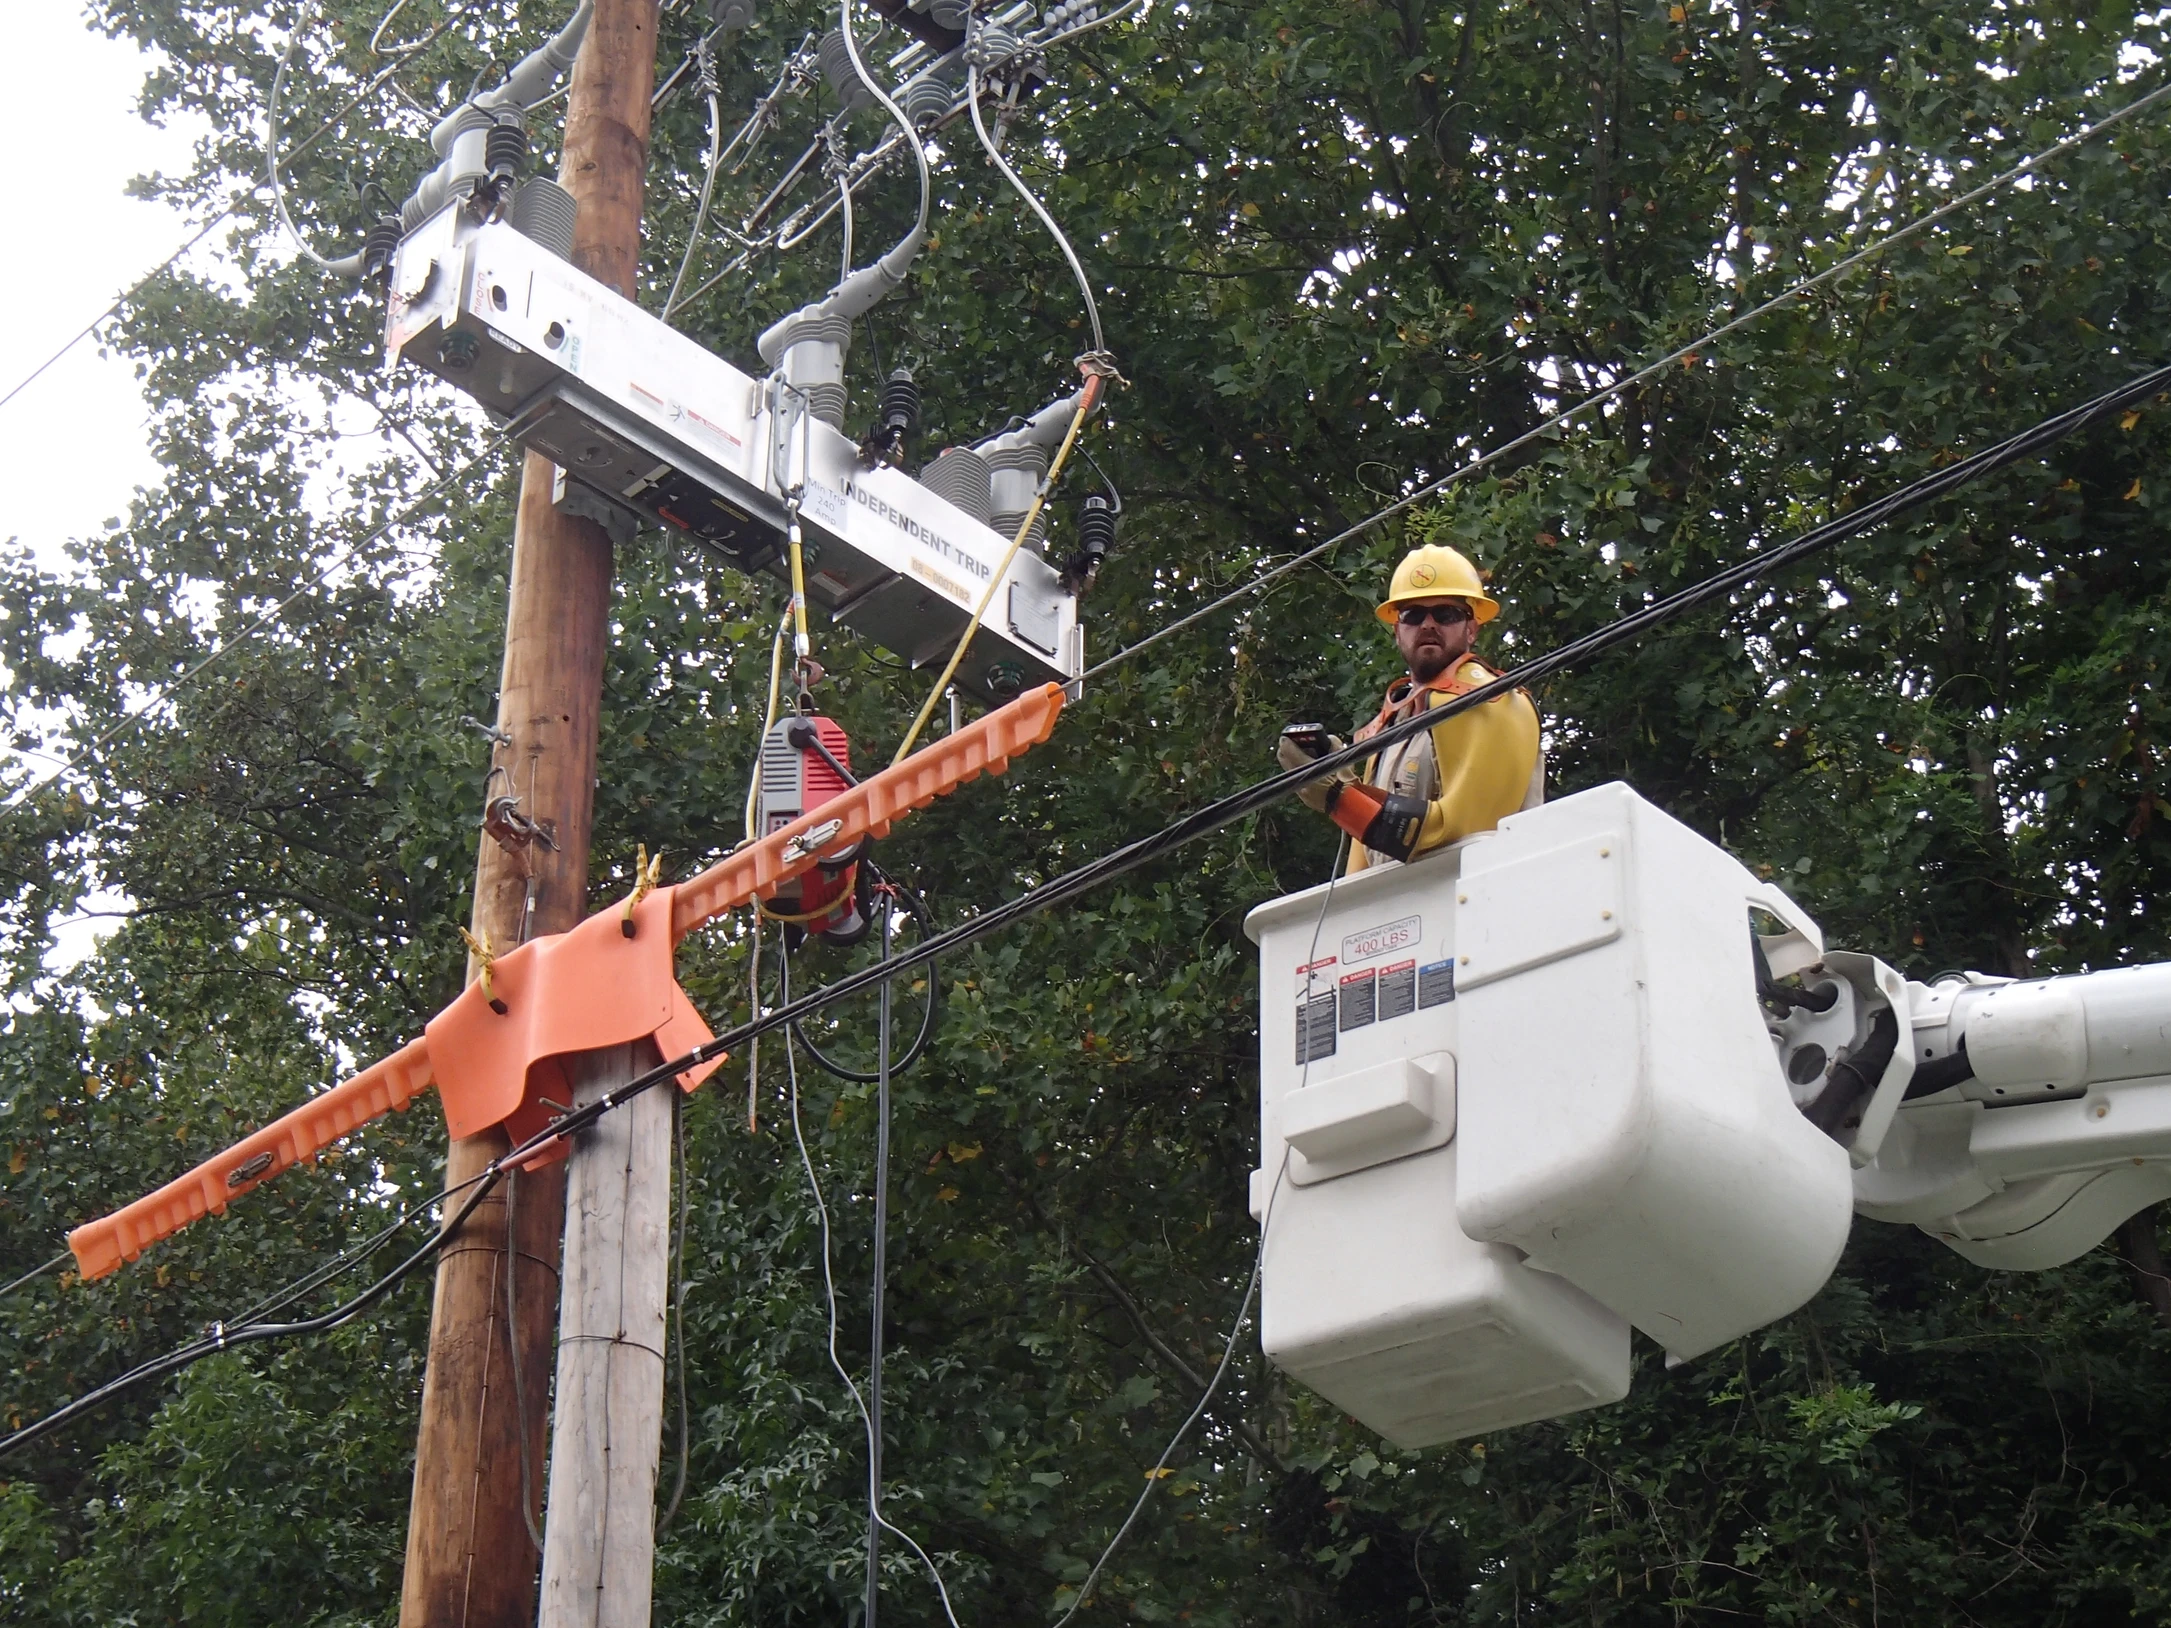
1) Plan the test like an outage, not like a bench test
Primary injection means:
-
Permits, barriers, communication plan
-
Clear roles (operator, safety watch, protection engineer)
-
Defined “stop” criteria if something looks wrong
-
Verification of connections and injection path before energizing
2) What to measure (keep it practical)
For overcurrent protection, you typically care about:
-
Trip time at selected current levels (mirrors your ANSI 50/51 intent)
-
Consistency (repeatability across 2–3 runs)
-
Breaker response (does it open cleanly? any sluggishness?)
-
Observed relay events (does the relay record the expected cause and element?)
Primary injection can also reveal a classic issue: the relay is perfect under secondary injection, but the installation isn’t—wrong polarity, wiring mistakes, CT issues, or trip circuit weaknesses.
3) Using primary injection equipment responsibly
A regulated primary system gives you control and stability (and reduces the “wild west” feeling of high-current work). In our world at EuroSMC, a flagship example is the Raptor Primary System, designed for primary injection in electrical testing workflows.

I’m deliberately not turning this into a product pitch. The point is: when you inject primary current, you want:
-
Stable output
-
Clear measurement
-
Safe, repeatable setups
-
A workflow that matches substation reality (not just a lab demo)
4) Don’t skip documentation (this is where teams lose value)
If you do primary injection and your report is “it passed”, you’ve lost most of the value. A good report includes:
-
Test configuration (where injected, what path, which phases)
-
Relay settings group and key elements enabled
-
Measured pickup/times and tolerances used
-
Breaker response notes
-
Any anomalies and corrective actions
This is also where software-driven reporting earns its keep: consistent naming, templates, storing results by bay/feeder, and making the next outage faster.
Decision matrix: which one should you run?
Use this as a practical guide:
| Scenario | Recommended approach |
|---|---|
| Routine maintenance (relay health + settings confidence) | Secondary injection + functional trip |
| Commissioning new bay / major retrofit | Secondary injection first, then primary injection for end-to-end confidence |
| Trip happened unexpectedly (nuisance trip) | Start secondary to validate settings/logic, then consider primary if installation doubts remain |
| “It works on the bench but not in the yard” | Go primary injection (or strong wiring/CT verification) |
| Tight outage window | Secondary injection targeted points + strong reporting |
My bias: prove the relay first (secondary), then prove the chain (primary)—unless the problem statement screams “installation”.
Conclusion
If you remember one thing: secondary injection and primary injection are complementary. Secondary injection is your fastest path to proving relay behavior (ANSI 50/51 pickup and timing, logic, outputs). Primary injection is your strongest path to proving the physical installation and end-to-end performance.
In EuroSMC, we build tools across both worlds—because substations live in both worlds. The best test strategy is the one that gives you confidence and leaves behind evidence a future engineer can trust.
Quick FAQs
Is secondary injection enough for commissioning?
Often it’s the best starting point, but commissioning usually benefits from at least one end-to-end validation (functional trip and, where justified, primary injection).
Can I test ANSI 51 curves with primary injection?
Yes, but it’s usually slower and more demanding operationally. Many teams validate the curve via secondary injection and reserve primary injection for selected end-to-end checks.
What’s the most common field mistake?
Skipping documentation and repeating “manual” tests differently each time. Repeatability is half the battle.